Overview
This article will explain how to create a discussion forum and discussion topic, and how the two items are related.
Instructions
Discussion forums organize discussion topics into categories. Before you can create a discussion topic, you will need to create a forum.
1. At the top of your course page, from the blue course navigation bar, click Content.
2. Navigate to the Unit or Lesson where you want your discussion to appear.
3. Click the gray Create New button at the top of the page.

4. Select Discussion from the next page.

5. Input a name for your topic.

6. If you do not have a forum in your course, Brightspace will create a forum in your course at the same time as your topic. You can change the title of the forum (or select an existing forum in your course) by clicking the blue hyperlink text Change Forum.

7. A pop-up box will appear. Make your desired changes to the forum, and click the blue button Apply Changes.

8. For Grade Out Of, enter the number of points for the discussion. Note: Do not enter a zero for an ungraded discussion; leave as ungraded.
Select whether the discussion will be in the Grade Book by clicking the drop-down menu.
- Edit or Link to Existing: Choose to either create and link to a new grade item, or link to an existing grade item.
- Not in Grade Book: Selecting this will prevent the discussion from being used for grading calculations. This is not a recommended setting.
- Reset to Ungraded: Will remove points and discussion from Grade Book.
9. Enter any applicable Description for the discussion.
10. If you do not wish to configure your discussion further, toggle the item to Visible and click Save and Close.
Details on advanced settings are below.
Setting Availability Dates
To set a start date and end date
- From the New Topic page, expand the Availability Dates & Conditions accordion.
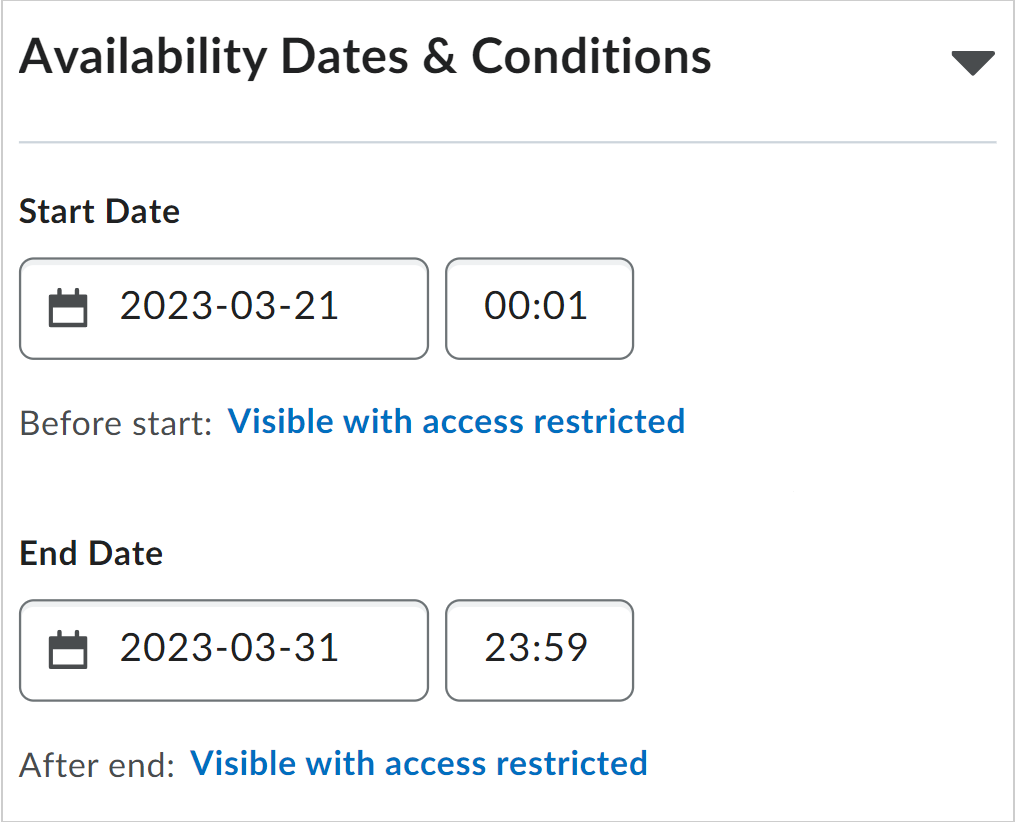
- Set a Start Date and an End Date.
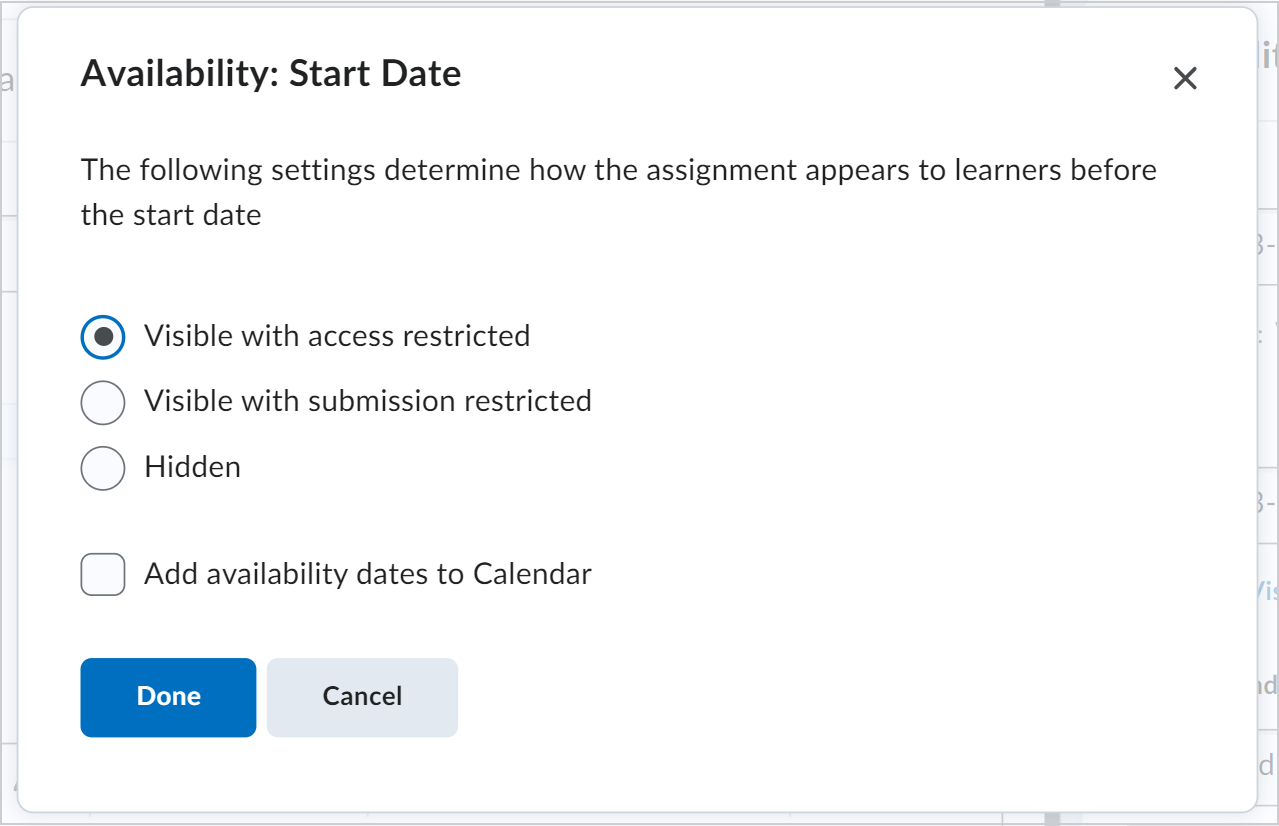
- Click the availability fields below the start and end date. In the Availability dialog, choose from the following for each date:
- Visible with access restricted: The discussion topic will be visible to learners before the Start Date or after the End Date, but they cannot click or open it. Learners can see the name, dates, and restrictions but cannot see the description or attachments.
- Visible with submission restricted: The discussion topic will be visible to learners before the Start Date or after the End Date, and they can click or open it, but but they cannot post or reply.
- Hidden: The discussion is hidden to learners until the start date is reached or after the end date passes. Learners cannot see the discussion anywhere, including corresponding Calendar events and Notifications.
- In the dialog, choose to select Add availability dates to Calendar if you want the start or end date available in your course calendar.
The new discussion topic is created with specified start and end dates.
Release Conditions
You can add release conditions to your discussion topic. Release conditions are conditions that must be met for the topic to be made visible to learners. For example, you can set your discussion topic to only be available to learners when they achieve a specified score on a quiz.
To create a new release condition
- From the New Topic page, expand the Availability Dates & Conditions accordion.
- Under Release Conditions, click Add Release Condition and select Create New.
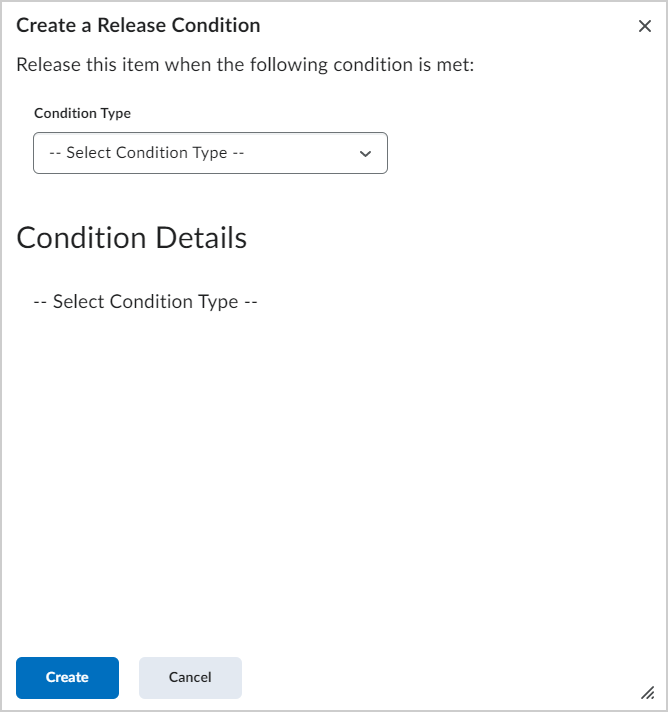
- Under Condition Type, select the condition that must be met.
- Under Condition Details, select the topic in which this condition must be met.
- Click Create.
- If you do not wish to configure your topic further, toggle the topic to Visible and click Save and Close.
A new release condition is added to your discussion topic. Release conditions can be reused in future grade items.
Post and Completion
In the Post & Completion accordion, select any of the following options to apply them to your discussion topic:
- Default participation
- Allow learners to hide their name from other learners
- Learners must start a thread before they can view or reply to other threads
- Posts must be approved before they display in the topic
If you do not wish to configure your topic further, toggle the topic to Visible and click Save and Close.
Evaluation and Feedback
- From the New Topic page, expand the Evaluation & Feedback accordion.
- You may attach a rubric to the discussion topic by selecting the Add Rubric menu and then Create New.
- If your college uses Learning Objectives, you can associate them with your discussion topic by selecting Manage Learning Objectives.
- If you would like to evaluate individual posts (such as a student's original post or replies), select the checkbox Allow Evaluation of Individual Posts. Select the calculation method and whether to treat unevaluated posts in the topic as a Zero.
- Select if learners should be allowed to rate posts.
- If you do not wish to configure your topic further, toggle the topic to Visible and click Save and Close.